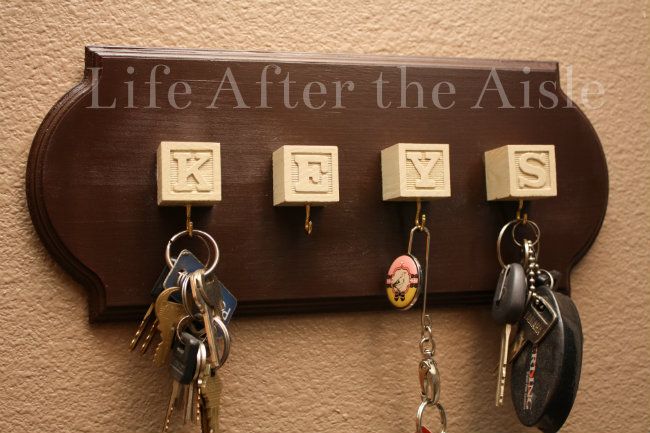
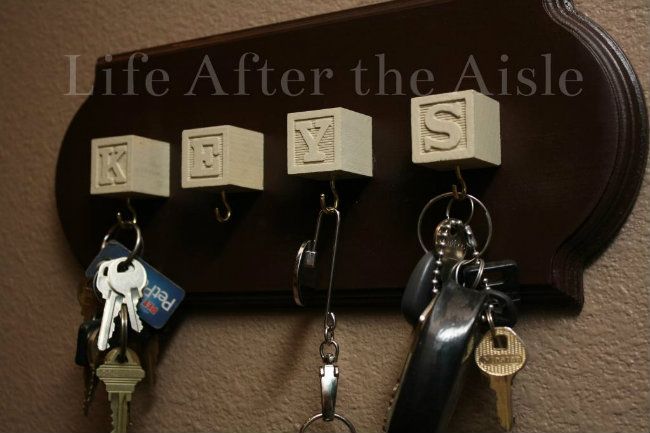
We've all seen it. That cute little key rack with the toy cube letters spelling out 'keys'. Yep - that is what I used as my inspiration. Let's face it; this was so easy especially compared to the other projects we have been tackling! Here is our version:

The best part about it was cost - THe only purchase for this project was the block letters that I got at hobby lobby with a 40% off coupon. soooo total for this one was probably close to $2.50.
Here's the pin-spiration:
Here's the pin-spiration:
I made a sign for the finance department when we shared an office.
Then the department outgrew said office and we split up so the sign came down.
Step 1: I had to pull off all the bling and sand that puppy down to the point that most of the paint and all the lettering was gone.
Step 2: I sprayed it brown and each of the letter blocks an off white. This took a lot of coats because the spray paint wasn't real thick. In hindsight, I probably should have used an acrylic paint and paint brush.
Step 3: I screwed in the hooks to the bottom of the blocks.
Step 2: I sprayed it brown and each of the letter blocks an off white. This took a lot of coats because the spray paint wasn't real thick. In hindsight, I probably should have used an acrylic paint and paint brush.
Step 3: I screwed in the hooks to the bottom of the blocks.
Step 4: Put it together!
The tricky part came when it was time to screw the blocks to the board...I had every intention of doing this myself, but I came home and The Husband had done it for me while I was at work. Apparently it is a good thing he did! He said the wood was so hard that the drill bit had trouble grabbing on and getting through the wood. Thankfully The Husband is a big strong man =)
The tricky part came when it was time to screw the blocks to the board...I had every intention of doing this myself, but I came home and The Husband had done it for me while I was at work. Apparently it is a good thing he did! He said the wood was so hard that the drill bit had trouble grabbing on and getting through the wood. Thankfully The Husband is a big strong man =)

I LOVE it so much and I always know where our keys are!
Except when this photo was taken haha - where are The Husband's truck keys?! =)
Where do you store your keys?
Do you often lose track of them?


12 comments:
I LOVE it!! So cute! :) Great job. You are just too darn crafty!
Nice work! We currently keep our keys in a big clay jar...although I often end up leaving them on the table. :)
yay! you linked up :) $2.50 is a great project in my mind!! ha It looks so so good and useful too!
Thanks for linking up!
Super cute idea!!! I need to attempt some Pinterest projects!
What a cute key rack. I hadn't seen the original pin before, but I have to say I like yours more.
We have a table right inside the front door with a basket on it. If I put my keys in the basket as soon as I walk in the door, they can't wander away.
That is such a cute key rack! I hate not being able to find my keys!
I'm shocked I haven't seen this pin around the P-Cult! ;)
I LOVE IT!!! So unique!
My car keys now hang on a lonely nail on the wall because I DO always loose my keys. My husband's go with him wherever he goes so he never looses them. :)
What an awesome idea. LOVE IT!!!
Stopping by from SPD!
Great job on this! I love the concept. In my old house I used to hang my keys on a hook, but in our current house I always put them in a small basket. It's kind of my designated key area! You'd think my husband would follow my lead since he can never find things. But of course...he doesn't. I get aggravated at him when he asks, "have you seen my keys?" or when he uses my car and doesn't put my keys back in MY spot :)
I'm so sursprised that I've never seen this pin. It turned out great!
Omg!! I'm in love! This is incredible! I don't know shy I've never seen this!!
Super cute!!! :)
Post a Comment