


Here is the orginal picture for my inspiration from Blissfully Ever After

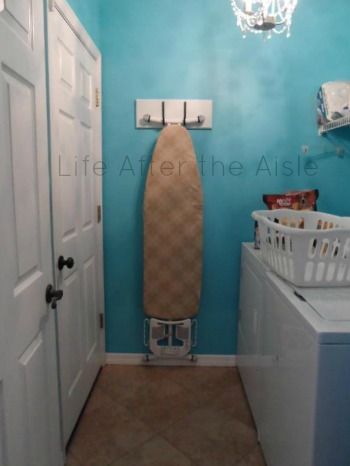
My ironing board holder isn't quite as fancy as hers....I haven't decided if I want to add a saying to it or now. For now, it is cute and simple and to the point.
FIRST THINGS FIRST!
Your supplies list:
hooks of some sort (big enough to fit your ironing board)
wood
paint
something to hang it from the wall
tools - drill, screw driver (or screw bit), sander
We had the wood and some saw-toothed hanging hardward leftover from a previous project. I ended up buying a paint that I liked...it isn't just plain ol' white - it is iced arctic or something....basically it is a very muted ice blue color.
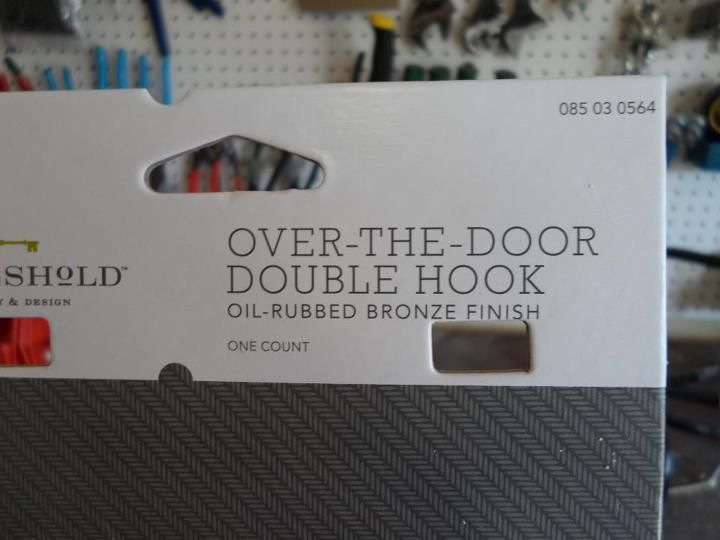
I also had to buy some hooks. I tried cutesie hooks like Jennifer used for her stand but i must have a strange sized ironing board because those were too small for the 'feet' of my board. I went back and bought this:
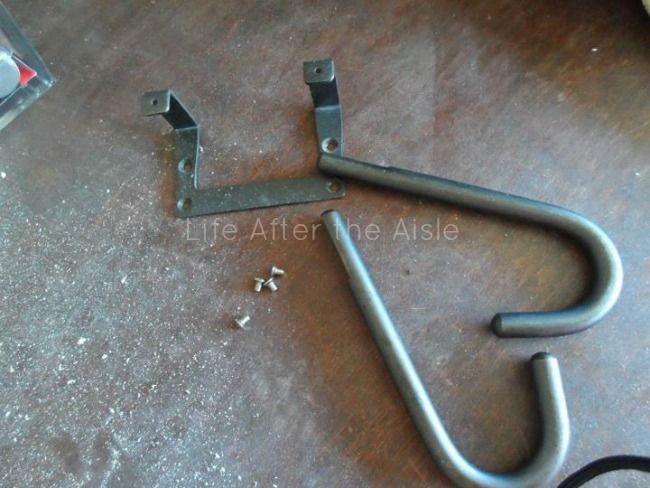
The Husband routed the edges of the board and I spray painted the pieces for the hooks. I had to paint them because they were a little dinged up from the husband making all the adjustments for them to lay flat on the board.

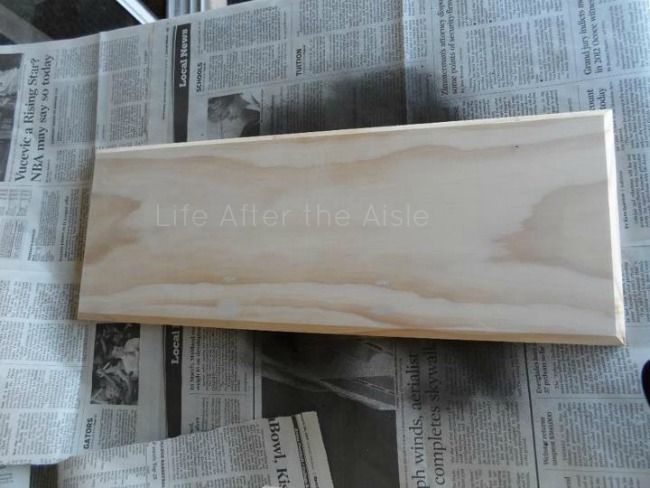
He drilled out some holes for the screws and I sanded the board.
***oh and in this photo, you can see where he wood-filled the holes he drilled because we couldn't find screws small enough and long enough so we thought we were going to have to liquid nail the hooks to the board. thankfully I found some screws that we could use later that day!
After I finished sanding the board, it was time to paint! Then we put it all together - adding the mounting brackets to the back of the board. We used two mounting brackets clost to the hooks since that is where most of the weight would be distributed.
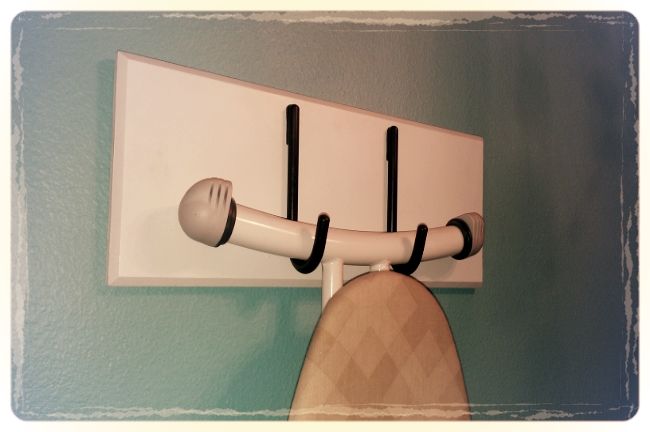
Time to hang! I love it! It makes me feel more organized.

Now we need to build a cabinet for over the washer and dryer and mayber a clothes rod to hang the clothes that must be line dried.


7 comments:
I saw this and pinned it some time ago! I don't own an ironing board, but an ironing pad. So I iron on the table, if I need to, or just take it to the dry cleaners ;)
But in our future home, I plan on getting an iron board and doing exaclty this! ;)
Would you believe me if I said I have not ONCE used an ironing board sicne living in our home (3 years)? AHhhhh hahaha! that makes me sound so pathetic. I love this idea though!
thank you for linking up girly :)
Sooo cute!!! I think I may need to make one myself!!
I need to make that ASAP! Love it!
I need this! May be making my own soon!
Do you have a chandelier in your laundry room? That's kind of amazing!
What a great idea! Mine is just leaning on a wall in the garage. Haha!
Post a Comment